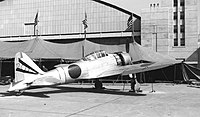
Santa Cruz Islands order of battle
This article needs additional citations for verification. (February 2022) |
The Battle of the Santa Cruz Islands was fought 25–27 October 1942 in the waters northwest of the Santa Cruz Islands by forces of the Imperial Japanese Navy's (IJN) Combined Fleet and the United States Navy's (USN) Pacific Fleet. The battle resulted from a major Japanese offensive with the goal to drive the US forces from Guadalcanal.
The battle can be viewed as a tactical Japanese victory as they sank the American aircraft carrier USS Hornet and badly damaged another, USS Enterprise, while suffering heavy damage in return to carriers Shōkaku and Zuihō. In strategic terms, however, it was ultimately a victory for the United States, as the Japanese failed in their objective to destroy American forces on and around Guadalcanal and suffered significant losses of experienced air crew.
Because the Japanese had the tactical initiative, their forces are listed first.
Forces deployed
[edit]Losses in parentheses
| Ship Type | IJN |
USN |
|---|---|---|
| Fleet carriers (CV) | 3 | 2 (1) |
| Light carriers (CVL) | 1 | |
| Battleships (BB) | 4 | 1 |
| Heavy cruisers (CA) | 8 | 3 |
| Light cruisers (CL) | 2 | 3 |
| Destroyers (DD) | 25 | 14 (1) |
| Combat Aircraft | 199 (99) | 136 (81) |
Japanese order of battle
[edit]
Advance Force
[edit]

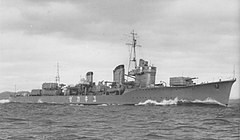
Vice Admiral Nobutake Kondo in heavy cruiser Atago
- Main Body
- Vice Admiral Kondo
- Cruiser Division 4
- 2 Takao-class heavy cruisers (10 × 8-in. main battery): Atago, Takao
- Cruiser Division 5 (Rear Adm. Sentaro Omori in heavy cruiser Myoko)
- 1 Myoko-class heavy cruiser (10 × 8-in. main battery): Myoko
- 1 Takao-class heavy cruiser (10 × 8-in. main battery): Maya
- Destroyer Squadron 2 (Rear Adm. Raizo Tanaka in light cruiser Isuzu)
- 1 Nagara-class light cruiser (7 × 5.5-in. main battery): Isuzu
- 2 Yugumo-class destroyers (6 × 5-in. main battery): Makinami, Naganami
- 3 Shiratsuyu-class destroyers (5 × 5-in. main battery): Kawakaze, Suzukaze, Umikaze
- Cruiser Division 4
- Carrier Group
- Rear Admiral Kakuji Kakuta in carrier Jun'yō
- Carrier Division 2
- 2 Hiyō-class fleet carriers
- Jun'yō
- 20 Mitsubishi A6M "Zeke" fighters (Lt. Yoshio Shiga)
- 17 Aichi D3A "Val" dive bombers (Lt. Masao Yamaguchi†)
- 7 Nakajima B5N "Kate" torpedo bombers (Lt. Yoshiaki Irikiin†)
- Hiyō[a]
- 21 Mitsubishi A6M "Zeke" fighters
- 18 Aichi D3A "Val" dive bombers
- 9 Nakajima B5N "Kate" torpedo bombers
- Jun'yō
- 2 Hiyō-class fleet carriers
- Screen
- 2 Kagerō-class destroyers (6 × 5-in. main battery): Kuroshio, Hayashio
- Carrier Division 2
- Support Group
- Vice Admiral Takeo Kurita in battleship Kongō
- Battleship Division 3
- 2 Kongō-class fast battleships (8 × 14-in. main battery): Kongō, Haruna
- Screen
- Battleship Division 3
Carrier Striking Force
[edit]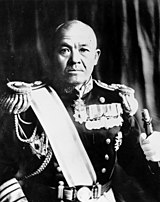
Vice Admiral Chūichi Nagumo
- Carrier Group
- Vice Admiral Nagumo
- 2 fleet carriers
- Shōkaku
- 20 Mitsubishi A6M "Zeke" fighters (Lt. Hideki Shingō)
- 21 Aichi D3A "Val" dive bombers (Lt. Cmdr. Mamoru Seki†)
- 24 Nakajima B5N "Kate" torpedo bombers (Lt. Cmdr. Shigeharu Murata†)
- Zuikaku
- 20 Mitsubishi A6M "Zeke" fighters (Lt. Ayao Shirane)
- 23 Aichi D3A "Val" dive bombers (Lt. Sadamu Takahashi)
- 20 Nakajima B5N "Kate" torpedo bombers (Lt. Shigeichiro Imajuku†)
- Shōkaku
- 1 light carrier
- Zuihō
- 20 Mitsubishi A6M "Zeke" fighters (Lt. Masao Satō)
- 6 Nakajima B5N "Kate" torpedo bombers (Lt(jg). Ichiro Tanaka)
- Zuihō
- Screen
- 1 Mogami-class heavy cruiser (10 × 8-in. main battery): Kumano
- 7 Kagerō-class destroyers (6 × 5-in. main battery): Hatsukaze, Yukikaze, Maikaze, Hamakaze, Amatsukaze, Tokitsukaze, Arashi
- 1 Akizuki-class destroyer (8 × 4-in. main battery): Teruzuki
- 2 fleet carriers
Vanguard Group
[edit]
Rear Admiral Hiroaki Abe in Hiei
- Battleship Division 11
- 2 Kongo-class fast battleships (8 × 14-in. main battery): Hiei, Kirishima
- Cruiser Division 7 (Rear Adm. Shoji Nishimura)
- 1 Mogami-class heavy cruiser (10 × 8-in. main battery): Suzuya
- Cruiser Division 8 (Rear Adm. Chūichi Hara in Tone)
- 2 Tone-class heavy cruisers (8 × 8-in. main battery): Tone, Chikuma
- Destroyer Squadron 10 (Rear Adm. Susumu Kimura)
- 1 Nagara-class light cruiser (7 × 5.5-in. main battery): Nagara
- 3 Yugumo-class destroyers (6 × 5-in. main battery): Makigumo, Kazagumo, Yūgumo
- 4 Kagerō-class destroyers (6 × 5-in. main battery): Akigumo, Urakaze, Tanikaze, Isokaze
American order of battle
[edit]Task Force 16
[edit]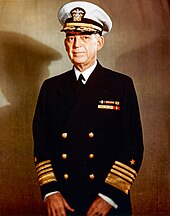


Rear Admiral Thomas C. Kinkaid
Task Force 16
[edit]Rear Admiral Kinkaid in fleet carrier Enterprise
- 1 Yorktown-class fleet carrier
- Enterprise (Capt. Osborne B. Hardison)
- Air Group (Cmdr. Richard K. Gaines)
- VF-10: 34 F4F Wildcat fighters (Lt. Cmdr. James H. Flatley)
- VB-10: 14 SBD Dauntless dive bombers (Lt. Cmdr. James A. Thomas)
- VS-10: 20 SBD Dauntless scout bombers (Lt. Cmdr. James R. Lee)
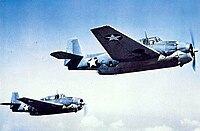
- VT-10: 9 TBF Avenger torpedo bombers (Lt. Cmdr. John A. Collett†)
- Air Group (Cmdr. Richard K. Gaines)
- Enterprise (Capt. Osborne B. Hardison)
- Screen
- 1 South Dakota-class fast battleship (9 × 16-in. main battery): South Dakota
- Cruiser Division 4 (Rear Adm. Mahlon S. Tisdale in heavy cruiser Portland)
- 1 Portland-class heavy cruiser (9 × 8-in. main battery): Portland
- 1 Atlanta-class anti-aircraft light cruiser (16 × 5-in. main battery): San Juan
- Destroyer Squadron 5 (Capt. Charles L. Cecil)
- 1 Porter-class destroyer (8 × 5-in. main battery): Porter
- 1 Mahan-class destroyer (5 × 5-in. main battery): Mahan
- Destroyer Division 10 (Cmdr. Thomas M. Stokes)
- 5 Mahan-class destroyers (5 × 5-in. main battery): Cushing, Preston, Smith, Conyngham, Shaw
- 1 Gridley-class destroyer (4 × 5-in. main battery): Maury
Task Force 17
[edit]Rear Admiral George D. Murray in fleet carrier Hornet
- 1 Yorktown-class fleet carrier
- Hornet (Capt. Charles P. Mason)
- Air Group (Cmdr. Walter F. Rodee)
- VF-72: 38 F4F Wildcat fighters (Lt. Cmdr. Henry G. Sanchez)
- VB-8: 15 SBD Dauntless dive bombers (Lt. James E. Vose)
- VS-8: 16 SBD Dauntless scout bombers (Lt. Cmdr. William J. Widhelm)
- VT-6: 15 TBF Avenger torpedo bombers (Lt. Edwin B. Parker, Jr.)
- Air Group (Cmdr. Walter F. Rodee)
- Hornet (Capt. Charles P. Mason)
- Screen
- Cruiser Division 5 (Rear Adm. Howard H. Good) in heavy cruiser Northampton
- 1 Northampton-class (9 × 8-in. main battery): Northampton
- 1 Pensacola-class heavy cruiser (10 × 8-iun. main battery): Pensacola
- 2 Atlanta-class anti-aircraft light cruisers (16 × 5-in. main battery): San Diego, Juneau
- Destroyer Squadron 2 (Cmdr. Arnold E. True)
- 5 Sims-class destroyers (4 × 5-in. main battery): Morris, Anderson, Hughes, Mustin, Russell
- 1 Benson-class destroyer (4 × 5-in. main battery): Barton
- Cruiser Division 5 (Rear Adm. Howard H. Good) in heavy cruiser Northampton
Individual attack waves
[edit]Attack on Hornet (Nagumo carrier group first wave)
[edit]- 21 Mitsubishi A6M "Zeke" fighters (9 of which divert to attack incoming aircraft)
- 21 Aichi D3A "Val" dive bombers
- 22 Nakajima B5N "Kate" torpedo bombers (2 as navigational aid only)
Attack on Enterprise group (Nagumo carrier group second wave)
[edit]- 9 Mitsubishi A6M "Zeke" fighters
- 19 Aichi D3A "Val" dive bombers
- 16 Nakajima B5N "Kate" torpedo bombers
Jun'yo 1st wave against Enterprise group
[edit]- 12 Mitsubishi A6M "Zeke" fighters
- 17 Aichi D3A "Val" dive bombers
Jun'yo 2nd wave (1 torpedo hit on towed Hornet)
[edit]- 8 Mitsubishi A6M "Zeke" fighters
- 7 Nakajima B5N "Kate" torpedo bombers
Zuikaku 3rd wave (1 bomb hit on Hornet being abandoned)
[edit]- 5 Mitsubishi A6M "Zeke" fighters
- 2 Aichi D3A "Val" dive bombers
- 7 Nakajima B5N "Kate" torpedo bombers
Jun'yo 3rd wave (1 bomb hit on abandoned Hornet)
[edit]- 6 Mitsubishi A6M "Zeke" fighters
- 4 Aichi D3A "Val" dive bombers
US first wave (Hornet): bomb hits on Shokaku, torpedo misses on Tone
[edit]- 8 F4F Wildcat fighters
- 15 SBD Dauntless dive bombers (two shot down)
- 6 TBF Avenger torpedo bombers
US second wave (Enterprise): 1 bomb on Chikuma, torpedo misses on Suzuya
[edit]- 8 F4F Wildcat fighters (3 shot down, 1 returned)
- 3 SBD Dauntless dive bombers
- 9 TBF Avenger torpedo bombers (2 shot down, 2 returned)
US third wave (Hornet): 2 bombs, 1 torpedo on Chikuma
[edit]- 7 F4F Wildcat fighters
- 9 SBD Dauntless dive bombers
- 10 TBF Avenger torpedo bombers
Notes
[edit]References
[edit]Bibliography
[edit]- Frank, Richard B. (1990). Guadalcanal: The Definitive Account of the Landmark Battle. New York: Penguin Group. ISBN 0-14-016561-4.
- Hammel, Eric (1999). Carrier Strike: The Battle of the Santa Cruz Islands, October 1942. Pacifica, California: Pacifica Press. ISBN 0-9355-5337-1.
- Lundstrom, John B. (2005). The First Team and the Guadalcanal Campaign: Naval Fighter Combat from August to November 1942 (New ed.). Annapolis, Maryland: Naval Institute Press. ISBN 1-59114-472-8.
- Morison, Samuel Eliot (1948). The Struggle for Guadalcanal, August 1942 – February 1943: Volume V of History of United States Naval Operations in World War II. Boston, Massachusetts: Little, Brown and Co. ISBN 0-7858-1306-3.


