Auckland Mounted Rifles Regiment
| Auckland Mounted Rifles Regiment | |
|---|---|
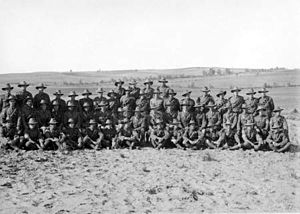 November 1918 picture of officers, NCOs, and men of the regiment, the survivors of those who enlisted in 1914 | |
| Active | August 1914 – 30 June 1919 |
| Country | New Zealand |
| Allegiance | |
| Branch | New Zealand Army |
| Role | Mounted infantry |
| Size | Regiment |
| Part of | New Zealand Mounted Rifles Brigade |
| Nickname(s) | Aucklands Mounteds[1] |
| March | D'ye ken John Peel[2] |
| Engagements | First World War Egyptian Revolution of 1919 |
| Commanders | |
| (1914–1917) | Charles Mackesy |
| (1917–1919) | James Neil McCarroll |
| Insignia | |
| Pugaree flash worn on the hatband | |
The Auckland Mounted Rifles Regiment was a mounted infantry regiment from New Zealand raised, in August 1914, for service during the First World War. It was assigned to the New Zealand Mounted Rifles Brigade, part of the New Zealand Expeditionary Force.
The regiment was established with twenty-six officers, 523 other ranks and 600 horses. It was formed from three squadrons belonging to pre war Territorial Force regiments: the 3rd (Auckland) Mounted Rifles, the 4th (Waikato) Mounted Rifles and the 11th (North Auckland) Mounted Rifles. It included a small headquarters and, until 1916, a Maxim machine-gun section. During the war, the Maxim guns were withdrawn but the regiment's fire-power increased until each squadron had four Hotchkiss machine-guns, one per troop, by the end of the war.
As mounted infantry, the regiment rode into battle on their horses but were expected to dismount and fight on foot. The regiment fought predominantly against the forces of the Ottoman Turkish Empire. Their first engagement was in the Gallipoli Campaign between May and December 1915, during which they participated in the largest battle of that theatre at Chunuk Bair and the fighting for Hill 60. Evacuated to Egypt, the regiment took part in the Sinai and Palestine Campaign from 1916 to 1918. Their early battles included Romani, Gaza and Beersheba. Later in the war, they were part of the force that occupied the Jordan Valley and took part in the raids on Amman and Es Salt. Their final wartime operation was in connection with the capture of the Turkish Fourth Army. During the four years of war, the regiment sustained 334 dead from all causes and 555 wounded, several of those more than once. After the war, the regiment played a minor role in the Egyptian Revolution of 1919 before it was disbanded in June 1919.
History
[edit]Formation
[edit]
The Auckland Mounted Rifles Regiment was raised in August 1914, at the start of the First World War, from the region around Auckland on the North Island of New Zealand.[3] The regiment was commanded by Lieutenant-Colonel Charles Ernest Randolph Mackesy,[4] and comprised a headquarters, a machine-gun section and three squadrons formed from Territorial Force regiments.[5] The New Zealand Territorial Force included a compulsory training system and New Zealand's four military districts were required to supply a mounted regiment for the New Zealand Expeditionary Force. To meet that obligation, each of the Territorial Force regiments provided a squadron, which kept its own regimental badges and traditions.[6] The squadrons for the Auckland Mounted Rifles came from the 3rd (Auckland) Mounted Rifles, the 4th (Waikato) Mounted Rifles and the 11th (North Auckland) Mounted Rifles.[7]
Upon its establishment, the regiment comprised twenty-six officers and 523 other ranks, who were mounted on 528 riding horses, seventy-four draught horses and six pack horses. Each squadron of 158 men had a field headquarters and four troops. Although the regiment used horses, they were not cavalry but mounted infantry, and were expected to ride to the battlefield, dismount and fight as traditional infantry.[5][8] The regiment was assigned to the New Zealand Mounted Rifles Brigade, serving alongside two other mounted infantry regiments—the Wellington Mounted Rifles and the Canterbury Mounted Rifles.[9]
Embarkation
[edit]What remained of August and most of September was taken up with training, until the regiment received embarkation orders and set sail from Auckland on 23 September. The unescorted transport ships returned to the same harbour the next morning, believing two German cruisers, were in the area. The troops disembarked and it was not until 11 October that they sailed again.[10] This time they reached Wellington on 14 October. Two days later, now part of a large convoy of transport ships, four warships and 9,000 men, they sailed again for an "unknown destination".[11] Stopping at Hobart, the New Zealand convoy waited until 1 November to be joined by an Australian contingent, then thirty-eight ships set sail, heading north.[12] With only brief halts to re-coal at Colombo on 15 November and Aden on 24 November, the convoy entered the Suez Canal on 1 December. Four days later, the regiment disembarked at Alexandria.[13] They entrained for Cairo and established their camp on the edge of the desert, in the suburb of Zeitoun. In the following months, the regiment practised their horsemanship, conducted small arms and bayonet training, and learned to construct trenches.[14]
Gallipoli
[edit]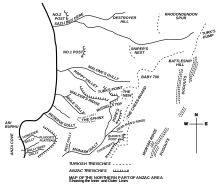
In May 1915, the regiment, with the rest of the brigade, was warned to prepare to embark for the Gallipoli Campaign, serving in a dismounted role as part of the Australian and New Zealand Army Corps (ANZAC). A rear party remained behind to look after the horses while twenty-six officers and 482 other ranks boarded the transport ships.[15] On 12 May they landed at ANZAC Cove and the next day took over from the Royal Naval Brigade in the front line.[16] The regiment was responsible for the section of the front known as "Walker's Top" and "The Nek", opposite what was possibly the strongest Turkish position, only fifty yards (46 m) away.[17][nb 1]
They defeated their first Turkish attack on 18/19 May, when their position was subjected to small arms fire from midnight until 03:00. Then the Turkish troops assaulted "Walker's Top" and "Quinn's Post". The attack lasted an hour, and cost the regiment twenty-two dead and twenty-seven wounded, but they held the position. On 22 May they were relieved by the 9th Light Horse Regiment, and moved to the rear.[16][19] In June the regiment repeatedly moved between front and rear area positions, and was not involved in a major battle. With Mackesy ill, Major Frank Chapman arrived from Egypt on 25 May to assume command of the regiment. He was followed five days later by one officer and 107 other ranks as reinforcements.[20] He was followed, five days later, by one officer and 107 other ranks of reinforcements. The situation remained the same in July, and another two officers and ten men arrived to replace casualties.[16][21]
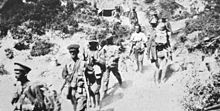
August saw the regiment involved in the largest engagement of the campaign, at Chunuk Bair. After successfully capturing a Turkish position at "Old No.3 Post" on 6 August, they fought off several counter-attacks, until 9 August, with a strength of only sixty-six men from the 310 who started the battle, they were withdrawn to a rear area.[16][22][23] Their casualties were fifty-seven dead, 144 wounded and twenty-seven missing in action.[16] On 23 August those survivors with the Wellington Mounted Rifles returned to the front line and four days later took part in the fighting around Hill 60. Their assault began at 17:00 and the regiment, with the Canterbury Mounted Rifles, captured the Turkish front line. The Wellington Mounted Rifles and Otago Mounted Rifles, following up, passed beyond the regiment to capture the Turkish reserve line. All four regiments suffered heavy casualties and had to fight off several counter-attacks. On 29 August the regiment was relieved and moved to a safer area; their casualties during the battle amounted to thirty-eight dead, and sixty-five wounded.[16][24]
Early in September the regiment, now five officers and eighty-three men, were moved back into the front line at "Cheshire Ridge". They were relieved on 12 September and left Gallipoli the next day for the rest camp on the island of Lemnos, where they were joined by three officers and 216 other ranks as reinforcements on 5 October. Three days later, James Neil McCarroll assumed command of the regiment on temporary promotion to lieutenant-colonel,[25] while Mackesy was temporarily commander of the brigade.[16] On 10 November the regiment, now ten officers and 286 other ranks, returned to Gallipoli, to prepare defences at "Waterfall Gully". Three days later, another sixty-six reinforcements arrived and moved into the front line at "Gloucester Hill". On 14 December the regiment left for Lemnos again. They remained on the island until 22 December, when they sailed for Egypt. Disembarking four days later, they returned to their previous camp at Zeitoun. Mackesy returned to command the regiment on 27 December.[16][26]
Sinai
[edit]The regiment spent its first month back in Egypt training. Then, once more back up to full establishment, it moved forward to defend the Suez Canal in the area of the Great Bitter Lake.[27] At the same time, it also lost some of its veterans, including those who were wounded and convalescing in England, when several men were transferred to the infantry and artillery on the Western Front.[28]

In March the regiment, still part of the brigade, was assigned to the newly formed ANZAC Mounted Division.[29][30] Then on 23 April the regiment was ordered to move into the Sinai Desert to counter a Turkish attack against the British yeomanry at Katia.[31] The following week the whole brigade relieved the 2nd Light Horse Brigade at Romani.[32] The defeated Turkish troops had withdrawn east around twenty-five miles (40 km) to Salmana and the brigade was ordered to attack those positions.[33] On 30 May the Auckland Mounted Rifles moved in advance of the brigade, circling around to get into a position to the south-south-east of Salmana. By 04:45 the regiment was ready and the attack started. They galloped towards the Turkish position on a mound, defended by around 200–300 men. Reaching the base of the mound, they dismounted and charged uphill with bayonets fixed. The defenders withdrew, pursued by the 3rd Squadron until Turkish reinforcements appeared and the squadron rejoined the regiment. Turkish casualties in the assault are unknown, but the regiment had only one man wounded.[34]
The regiment now lost its Maxim machine-gun section; the guns were withdrawn to help form the brigade Machine-Gun Squadron.[35] They were replaced with three Lewis guns, one per squadron.[36] The loss of the section reduced the regiment's establishment to twenty-four officers and 499 other ranks.[37]
Romani
[edit]At the end of July, the 3rd Squadron was sent to patrol twenty miles (32 km) to the south near the Nagid well, observing the left flank of a Turkish force crossing the Sinai.[38][nb 2] On 1 August patrols from the 11th Squadron were sent east of Dueidar, to the En Nuss and Nagid wells, as a defence force and to expand the wells to support a brigade. On 3 August the rest of the regiment moved to Dueidar. At that time, a Turkish force occupied Mount Royston at Romani. As a result, the regiment was ordered to rejoin the brigade, and by 11:30 they were observing around 2,000 Turkish troops on Mount Royston.[40][41] For the next thirty minutes the regiment was bombed by Turkish artillery, when a brigade attack was ordered. The 3rd Squadron, supported by Lewis guns from the machine-gun sections, was positioned in the centre of the line between the Canterbury Mounted Rifles and a British yeomanry regiment. The advance forced the Turkish outposts to withdraw. By 16:45, using the cover available, the regiment drew close enough to charge the Turkish defences, capturing 250 prisoners and a field hospital. All together the brigade took 1,000 prisoners and a mountain artillery battery.[42] The regiment's casualties were two dead and six wounded.[29]
Early the next day the NZMRB moved towards Katia, with the intention of attacking a Turkish gun emplacement. The brigade positioned itself between the 2nd Light Horse Brigade on the left and the 3rd Light Horse Brigade on the right. Taking the lead, the regiment advanced close enough by 14:30 to charge the position on horseback, then dismounted and continued the attack on foot, all in the face of heavy rifle and machine-gun fire. No progress was made and they spent the rest of the day returning fire from cover. The engagement cost the regiment one dead and six wounded.[43]
That night the regiment bivouacked at Katib Gannit and returned to the site of the battle the next day, 6 August, but the Turkish army had withdrawn eastwards. The brigade was ordered to advance until contact was regained with the Turkish force, which they located around 12:00, to the east of Oghratina. The regiment remained in contact all day, without suffering any casualties. They also located a telephone wire that the withdrawing Turks had failed to disconnect, enabling them to monitor the German and Turkish command issuing orders.[44]
Abd
[edit]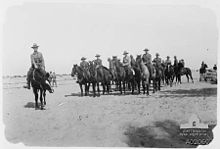
The next day the brigade became the division reserve, so the regiment had a day of rest. On the following day, 8 August, they advanced again. By then, Oghratina was unoccupied. Later that day reconnaissance patrols located the Turkish force around two miles (3.2 km) west of the well at Abd.[45]
After halting overnight, the regiment led the NZMRB at 04:30 to attack the Turkish position. By 05:15 the regiment made contact with the Turkish outposts and advanced on foot towards the main Turkish defences, under covering fire from the Royal Horse Artillery (RHA). The regiment had the 3rd Squadron on the left, and two troops of the 11th Squadron and a machine-gun section on the right. Their right flank was supposed to be covered by the 3rd Light Horse Brigade, but it had failed to arrive. In consequence the regiment had to extend its lines to cover the open flank, so two troops from the 4th Squadron were sent there. Things were also not going well on the other flank. At 11:20 the Canterbury Mounted Rifles were forced to retire. Then, just before midday, two Turkish battalions of about 1,100 men attacked the regiment. Still supported by the RHA, the brigade held its positions. For the next three and a half hours, the brigade was subjected to a heavy artillery bombardment. This was followed by another attack by three Turkish battalions. Holding out until 16:15 the regiment was then ordered to pull back. The day's fighting cost the regiment twelve dead and twenty-one wounded.[29][46]
Magdhaba
[edit]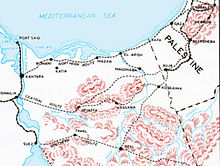
The next three months were spent on reconnaissance patrols and manning observation posts until 20 December, when the advance east recommenced, with the regiment forming the vanguard for the ANZAC Mounted Division. Travelling overnight, they reached El Arish by dawn, which had been evacuated by the Turkish forces.[47][48]
Magdhaba, with its 2,000-man garrison, was twenty-four miles (39 km) to the south-east, on the Wadi El Arish. At 10:30 on 22 December, the 3rd Squadron was sent along the wadi, in advance of the division, to determine whether the well at Lahfan could support the brigade. The brigade, leaving El Arish at midnight, followed the squadron. By daylight the division had surrounded Magdhaba. In the ensuing fighting, the village was captured after a bayonet charge in the late afternoon. The regiment, being held in reserve, took no part in the battle, but was afterwards left in charge of the village, clearing the dead and collecting war materials. It then returned to El Arish on Christmas Day.[29][49][50]
Palestine
[edit]Rafa
[edit]On 8 January 1917, the ANZAC Mounted Division headed out for their next objective, the police post at Rafa, thirty miles (48 km) to the east on the Egyptian-Palestinian border. Reaching Sheik Zowaiid at 22:00, the regiment rested for three hours. At dawn the regiment surrounded the Bedouin village Shokh El Sufi, four miles (6.4 km) south of Rafa. One of the inhabitants shot and killed one of the men. Another was knocked unconscious when hit on the head with a sword. Both of the Bedouins escaped on the troopers' horses.[51][52]
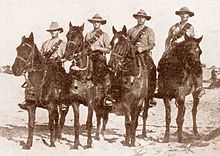
At 06:00, the regiment crossed the border into Palestine.[53] Moving out of the desert, the firmer ground made it easier for horse and wheeled transport. Forty-five minutes later, the regiment was located behind a ridge line observing the Turkish defences, which consisted of trenches and redoubts, with a good field of fire to their front. At 09:00 the brigade was ordered to move around to attack the position from the right flank, while covering the area north to the Mediterranean Sea. At 09:30 the attack started. Galloping forward for about one mile (1.6 km), the regiment was subjected to Turkish artillery fire. When they got within two miles (3.2 km) from the Turkish lines, they dismounted and advanced on foot with the 3rd and 4th Squadrons leading and the 11th Squadron in reserve. On the right were the Canterbury Mounted Rifles, on the left the 1st Light Horse Brigade; the Wellington Mounted Rifles were the brigade reserve. At midday, the complete brigade attacked the Green Knoll redoubt. The 3rd Squadron, unable to make any progress, held its position while the 11th Squadron moved around to the right of the 4th Squadron. By 15:00 the 3rd Squadron was able to move forward again and at 16:00 the regiment was preparing to charge the position. Then the division received word that Turkish reinforcements were approaching. That and the loss of daylight convinced Major-General Harry Chauvel, commanding the division, to order a withdrawal. However, the order never reached the brigade, which had fixed bayonets and charged the remaining 200 to 300 yards (180 to 270 m) to the Turkish trenches. They captured the first trench line, and the defenders started to surrender. Seeing what was happening, the remainder of the division returned to assist and the position was captured. The regiment's casualties for the battle were seven dead and forty-one wounded.[54][55][56]
Gaza
[edit]At 02:30 on 26 March, the regiment set out from Dier El Belah towards Gaza. The division was to circle the town, cutting off any escape route east and provide a blocking force to stop Turkish reinforcements, while the 53rd (Welsh) Division and a brigade of the 54th (East Anglian) Division carried out a frontal assault. Positioned at the Humra mound in the east with the 4th and 11th Squadrons, the regiment was assigned to watch for Turkish reinforcement coming from Huj. The main attack was not progressing well, so the brigade, along with the rest of the division, was ordered to attack Gaza. Still watching out for Turkish reinforcements, the regiment was held in reserve. The brigade had made good progress and was inside the town when it was ordered to withdraw. Less the 4th Squadron, which was the division's rearguard, the regiment had returned to Dier El Belah by early the next day.[57][58]
On 3 April the squadrons were issued Hotchkiss machine-guns, on a scale of one per troop, which replaced the regiment's three Lewis guns.[36][55][59] The second British attempt to take Gaza would be on 17 April, but the day before the brigade moved to Hareira, providing flank protection and preventing Turkish reinforcement from that direction. The regiment reached Shellal at 03:00, where they stopped to water their horses. At dawn hostile aircraft appeared overhead, which were engaged by the 11th Squadron, forcing them to fly at a higher altitude. By 09:00 the regiment was positioned overlooking Hareira, Sheria, and the Gaza-Beersheba rail line. Several times during the day they were machine gunned by hostile aircraft, but no casualties were sustained. That night at 22:00, as ordered, they returned to Shellal.[60]
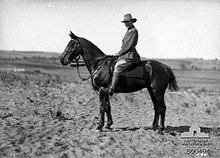
The next day the regiment returned to their previous task of flank protection. At midday the 3rd and 11th Squadrons were located along the ridge south-east of El Buggar, forcing the Turkish observation posts to retire. The day was almost a replica of the previous one and the regiment was back at Shellal at 21:30. Instead of resting overnight, they moved to El Mendur, arriving there at 06:00 on 19 April. The division was now required to be more aggressive, to draw the Turkish forces towards them, because of the lack of progress by the force attacking Gaza. The 3rd Squadron was detailed as a guard force for the division's artillery, accompanying them to Atawineh. The squadron moved into the front line, losing one dead and seventeen wounded by the time it withdrew at 20:00. The rest of the regiment was held in reserve, having two men wounded during an aircraft attack. By the end of the day, the second attempt to take Gaza was called off, the defences being to strong for a frontal assault.[61][62]
Instead of withdrawing, the British remained in a forward line of trenches and redoubts. The regiment positioned itself around Karim Abu El Hiseia, on the Wadi Ghuzze. McCarroll assumed command of the regiment again, Mackesy being appointed as the administrator of the Khan Yunus-Deir and the Belah region.[63] For the next few months patrol duty was interspersed with occupying the front line and training.[64]
Beersheba
[edit]At 17:00 on 25 October the regiment, located around twenty miles (32 km) from Beersheba, started to moved forward. Its first objective, fifteen miles (24 km) south-east at Esani, was reached at 01:00 on 26 October. Here they rested for two days before setting out again, travelling another fifteen miles (24 km) to Asluj to the south of Beersheba. Waiting until the next night at 18:00, they started north to attack Beersheba, the first ten miles (16 km) along a metalled road. Then they followed the Wadi Imshash for the next ten miles (16 km), stopping at 02:00 while the Canterbury Mounted Rifles reconnoitred a suspected Turkish post. The night march started again an hour later. By daylight the brigade was positioned three miles (4.8 km) to four miles (6.4 km) south of the Beersheba-Bir Arara Road, to the south-east of the one thousand feet (300 m) high Saba hill, with the regiment being the brigade reserve.[65]
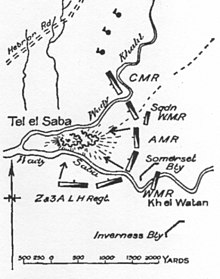
At 09:00 the regiment and the Somerset Battery RHA were ordered to attack Saba, to the east of Beersheba, positioned between the Canterbury Mounted Rifles on their right and the 3rd Light Horse Regiment on their left. The 11th Squadron, leading, advanced up a wadi under machine-gun fire, but there was plenty of cover for the men and horses. The squadron dismounted one hundred yards (91 m) from the Turkish front line and continued on foot. The 3rd and 4th Squadrons meanwhile had ridden to within eight hundred yards (730 m) to the north, then dismounted to continue on foot. Advancing by troops, covered by their machine-guns, good progress was made.[66][67] At 14:10 the regiment was ordered to assault the position. Thirty minutes later, a hill four hundred yards (370 m) east of Saba was taken with sixty prisoners and three machine-guns. A short while later, Saba itself was captured with 132 prisoners and four machine-guns. However, the regiment had six dead and twenty-two wounded, including a squadron leader.[68][69]
The regiment remained, consolidating Saba until 2 November while the brigade's other regiment and the 4th Squadron were fighting a Turkish cavalry force. On 4 November the brigade moved to Wadi El Sultan. The next day the 4th Squadron was tasked to support the Canterbury Mounted Rifles, advancing against a Turkish position eight hundred yards (730 m) away. The Turks counter-attacked the Canterbury Mounted Rifles, so the 3rd Squadron was moved forward to support them and the attack was defeated. The regiment lost one man dead and four wounded during the day's fighting. While the rest of the brigade retired to the west, the regiment remained at the front manning observation posts until 11 November, when they were relieved by the British Westminster Dragoons.[70][71]
Ayun Kara
[edit]The regiment left Beersheba to rejoin the brigade, then had to move sixty miles (97 km) across the front to the British left flank. Travelling through the night, at 07:30 they had reached Jemmaleh, where they rested for two hours. Continuing their advance, they reached Hesy at 13:30, Bureir at 14:30, then finally Hamama, where they established a rest camp. The march was difficult for men and horses, with virtually no food or water. The horses were taken to the sea to drink. Their supplies finally caught up with the regiment and that night they moved again to a new camp two miles (3.2 km) north of Sukereir. The next day the regiment rejoined the brigade, outside the village of Ayun Kara.[72]
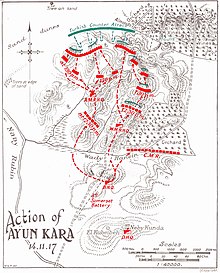
At 11:00 on 14 November the Canterbury Mounted Rifles, the brigade vanguard, encountered Turkish observation posts. The brigade ordered an attack on the main Turkish defences. The regiment was positioned to cover the left flank. Advancing by troops they came under machine-gun fire. The 3rd Squadron was dispatched to occupy the high ground on the regiment's right while the other squadrons took cover. Then a force of Turkish cavalry appeared to their left. McCarroll sent the 11th Squadron to check on their dispositions and numbers. However, the squadron encountered heavy rifle and machine-gun fire and could not move forward. To assist them, two troops from the 4th Squadron, were ordered to charge on horseback. The two troops captured the position and continued forward, occupying the high ground on the left in front of the Wellington Mounted Rifles. The 3rd Squadron, in reserve, provided covering fire as the 11th Squadron moved forward alongside the 4th on their left. Covered by the 4th Squadron, the 11th Squadron moved forward. At 14:15 the advance troops of the 11th Squadron located, in an orange grove, a Turkish concentration of troops that counter-attacked the regiment. McCarroll, who had kept up with his forward line of troops, ordered the rest of the regiment, including headquarters troops, to move up in support of the 11th Squadron. The 3rd Squadron galloped forward, dismounting just behind the front line, and engaged the Turkish attack with enfilade fire, forcing the Turks to retire.[73]
At 14:45, covered by an artillery barrage and machine-gun fire, the Turkish troops counter-attacked again. The regiment's machine gunners returned fire and for a short time the battle became a machine-gun engagement. During this time the Wellington Mounted Rifles, to the right, had occupied a prominent hill, but were under heavy fire. To support them, the 3rd Squadron sent two troops to engage their opponents, which they caught in the bottom of a valley, with enfilade fire. Then in front of the regiment a fresh Turkish battalion was sent to assault them. In some places, the Turkish force got close enough to throw hand grenades into the regiment's defences. These killed or wounded all those defending a small hill, which was then occupied by the Turkish troops, bringing indirect fire onto the rest of the regiment's positions, which by now were becoming untenable. At first, messengers sent to the 4th Squadron asking for assistance failed to get through. Eventually the squadron received the message and charged across the open ground, recapturing the hill. This brought the rest of the Turkish line into range of the squadron's guns. Confronted by the new threat, the Turkish troops retired back to their starting point. McCarroll was ordering a regiment attack on the orange grove when he was wounded in the neck and shoulder, forcing Major Henry Whitehorn to assume temporary command of the regiment. By then it was getting dark and the only Turkish offensive action was an artillery bombardment. Instead of attacking, the regiment spent the rest of the day evacuating the wounded and strengthening their lines. Their casualties during the battle were fifteen dead and seventy-four wounded.[55][74][75] The next morning it was discovered that Ayun Kara had been evacuated by the Turkish troops.[76]
River Auja
[edit]On 15 November the brigade moved forward again to Rishon LeZion village five miles (8.0 km) south of the port of Jaffa. The next day the regiment moved forward alone and established a line of observation posts between Beit Dejan and Safiriyeh, just under four miles (6.4 km) from Jaffa. Reconnaissance patrols discovered that Jaffa was not occupied by any Turkish forces, so the 3rd Squadron and the Canterbury Mounted Rifles moved in to provide a garrison, while the rest of the regiment and the Wellington Mounted Rifles returned to Ayun Kara. The regiment moved further north on 18 November and over the next few days carried out a reconnaissance of the River Auja.[55][77]
On 27 November the brigade secured a bridgehead over the river. To help defend the crossing, the 3rd and 11th Squadrons dug in on the northern bank. The next day, at 14:45, the squadrons were attacked and by 17:45, first the horse holders and the regiment's mounts were sent back across the river. The squadrons were forced to retire to the lines of the supporting infantry. By 20:00 the entire British position was under threat and had to withdraw back across to the south of the river. The regiment's casualties were one dead, one missing and nineteen wounded, including Whitehorn. Command of the regiment temporarily passed to Major Duncan Munro.[55][78][79]
After the battle at the River Auja, the brigade camped to the south-east of Sarona, out of range of the Turkish artillery. The regiment, having only sixteen officers and 375 other ranks left effective, spent the time building up its strength in men and horses.[80] In the last month the regiment had lost twenty-seven dead and eighty-eight wounded, sixty-one had to be evacuated to the rear as they were ill and two men were missing.[55]
Whitehorn returned on 16 December to resume temporary command of the regiment. Two days later the regiment returned to Jaffa and came under command of the 52nd (Lowland) Division. Then on 20 December the Lowland Division assaulted the River Auja and the regiment patrolled north of the river, supporting the division until 25 December, when they rejoined the NZMRB.[55][81]
Jordan valley
[edit]Jericho
[edit]McCarroll, recovered from his wounds, resumed command of the regiment on 15 January 1918. It was still understrength, with only twenty-two officers and 486 other ranks.[82]
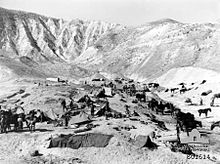
In February the ANZAC Mounted Division was ordered to cross over to the British right flank, to conduct operations in the Jordan Valley by first capturing Jericho.[83] By 19 February the regiment was east of Bethlehem and at 09:30 started toward Jericho along what was described as "little more than a goat track".[84] At times the track was so steep that the men had to dismount and lead their horses by hand. After stopping overnight, the regiment set out again as the vanguard at 04:30, moving in single file. Soon afterwards, Turkish guns opened fire on them from two hills, Kaneitera and Kalimun, which could dominate their approach. Upon reaching the valley bottom, the regiment spread out to provide a more difficult target. Moving forward under Turkish artillery and machine-gun fire, the regiment galloped from cover to cover by troops.[85][86] This continued until around midday when the 11th Squadron got close enough to assault a Turkish position on the right of the valley. At the same time, the 3rd and 4th Squadrons were advancing in the centre and to the left. Elsewhere the Australian light horse brigades and British infantry were having similar problems. Eventually the British secured a position that allowed then to bring fire onto the Turkish defences in front of the regiment, forcing them to retire further up the Kalimun hill. The regiment's horse holders brought the mounts forward and the regiment charged the position on horseback. The Turkish forces retired, but kept the hill now occupied by the regiment under an artillery barrage.[87]
The next day there was no trace of any Turkish forces and the advance continued. At times, this was again only possible by moving in single file, leaving the brigade spread along five miles (8.0 km) of tracks. At 09:00 the regiment moved out of the hills and into the Jordan Valley, just north of the Dead Sea and south of Jericho, about eight miles (13 km) from the River Jordan. The time it had taken the NZMRB to negotiate the track allowed the Turkish forces to retire to the east bank of the river by a pontoon bridge at Ghoraniyeh. While the Australians captured Jericho, the regiment established a camp in the valley under the Mount of Temptation, north of Jericho. The brigade was then made responsible for guarding the river from the Dead Sea to the Ghoraniyeh bridge.[88][89] However, on 22 February the rest of the NZMRB returned to Ayun Kara, leaving the regiment in the valley under command of the 60th (London) Division, tasked to carry out mounted patrols of the river.[90][91]
Amman raid
[edit]The regiment was next involved in a raid on the village of Amman to the east of the River Jordan. The force assembled for the operation comprised the ANZAC Mounted Division, the 60th (London) Division and the Imperial Camel Corps Brigade.[92] Reconnaissance patrols had discovered that the river was not fordable and they would have to construct bridges to get across. Three viable sites had been selected at Makhadet (which means ford), Hajlah three miles (4.8 km) north of the Dead Sea, and Ghoraniyeh. Two crossings were to be constructed. At Hajlaha, pontoon bridge made from steel would be assembled for the mounted troops. The second crossing point, at Ghoraniyeh where there was already a damaged pontoon bridge, would have three bridges for the 60th Division: a normal pontoon bridge, a barrel bridge, and an infantry bridge.[93]
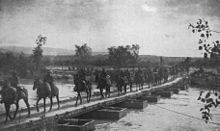
At midnight on 21 March, the infantry tried to cross at Ghoraniyeh, however the river was flowing too fast for their swimmers to get across. At Hajlah they had more success and a raft was constructed to ferry men and materials across. By dawn the Turkish had discovered them crossing and were engaging the crossing infantry with machine-gun fire. Engineers had finished the pontoon bridge by 08:10 and more troops were crossing, but their exploitation was restricted to around five hundred yards (460 m) from the river line as they were confronted by strong Turkish defences.[94][95]
At 05:00 on 23 March the regiment, the first mounted force, began to cross the river. They were passing beyond the infantry forward troops by 07:30. Two troops from the 11th Squadron were dispatched to the east and another north-east. One troop, twenty men, encountered a force of sixty Turkish cavalry and charged them, armed only with rifles and bayonets. The troop killed twenty cavalrymen and captured seven, in exchange for the death of one man, the troop leader who had ordered the charge. The troop sent north had forced a machine-gun post covering the river to withdraw, but the gun and its crew were later captured by men from the 4th Squadron. While this move had been progressing, the troop of the 11th Squadron had been sent north from the crossing.[96] At the same time the 3rd and 4th Squadrons galloped north to take the Turkish defenders at Ghoraniyeh from the rear. At 09:00 the leading troops, without loss, captured the first Turkish outpost with seventeen prisoners. One troop of the 3rd Squadron dismounted and captured two machine-gun posts overlooking the crossing, which allowed the rest of the squadron to drive off the remaining defenders. While the 3rd Squadron concentrated on the crossing the 4th Squadron was ordered to gallop and capture the village of Shunet Nimrin, but were unable to approach the village when confronted by heavy artillery fire. The day's battle cost the regiment one dead and two wounded. By that night the bridge at Ghoraniyeh was completed and the remainder of the ANZAC Mounted Division were crossing at Hajlah.[96][97]

The next morning, when the NZMRB had crossed the river, McCarroll was given command of the vanguard, comprising the regiment, a squadron from the Canterbury Mounted Rifles and the Hong Kong and Singapore Mountain Artillery Battery.[nb 3] Progress was slow along the steep tracks and they had to camp in the hills that night at an altitude between 2,000 to 3,000 feet (610 to 910 m).[100] During the night it started to rain, making travelling along the small tracks even harder at daylight. Because the rest of the division was having even worse problems than the brigade, they stopped at the village of Ain es Sir. During the day, they captured seven Germans and eighty-eight Turkish troops. Another problem for the regiment was the lack of supplies; their rations were stuck somewhere behind them on the track. The remainder of the division arrived during the day and the raid on Amman was planned for the next day, 27 March.[101][102]
At 08:00 the NZMRB set out heading south-east, the plan called for them to assault Amman from the south. The vanguard was provided by the regiment with the 4th Squadron leading. When they got within three miles (4.8 km) of the village, they came under a Turkish artillery barrage. At 12:00 when the regiment was 1,500 yards (1,400 m) from the rail line, which would be their right flank position, they turned north. Then a Turkish train arrived along the tracks from the south. The regiment's machine-gunners opened fire of it, and they were just about to charge when it continued on into Amman. By now Turkish artillery and machine-gun fire was proving effective and the regiment was unable to make any progress. Hill 3039, in front of the 3rd Squadron, was well defended with numerous machine-guns, so the 4th Squadron were sent forward to support the assault. While 11th Squadron moved right, to the higher ground, to give covering fire. At 18:00 Turkish troops mounted a counter-attack against the Canterbury Mounted Rifles on the regiment's left, but the regiment held the position. By nightfall no further progress was made and the division decided to hold onto what territory they had occupied and wait for assistance from 60th Division. The day's fighting had cost the regiment eighteen casualties. They still had not received any supplies and the rations they carried were exhausted.[82][103][104]
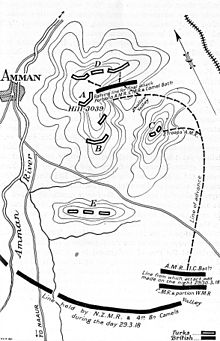
That night, 27/28 March, the Turkish forces in Amman were reinforced, which again prevented the regiment from advancing. When two infantry battalions and an artillery battery arrived at 11:30 plans were made for another assault at 13:00. But still faced with heavy artillery and machine-gun fire, by 16:00 the regiment had only managed to advance five hundred yards (460 m) onto the lower slopes of Hill 3039. The position there was untenable and the regiment was forced to withdraw to a better location that night.[105][106]
The next day, 29 March, the division consolidated their positions, planning to resume the assault on 30 March. McCarroll was given command of the assault. Position "A" was their main objective. The approach route would be along a ridge line between "B" and "C," which were to be neutralised by two troops in case the Turkish tried to intervene in the attack. Once "A" was captured, it was believed "B" and "C" would surrender.[107]
The regiment and a battalion from the Imperial Camel Corps would attack point "A". The Canterbury Mounted Rifles would support the attack on the regiment's left. At 01:45 the regiment moved forward, dismounted and managed to get close enough to the first objective to charge home without being seen, capturing the first trench, five machine-guns and twenty-three prisoners. The regiment continued on, capturing the position. At daybreak Turkish troops were able to bring enfilade fire from point "B" against the regiment's positions. So 4th Squadron, with 3rd Squadron providing covering fire, mounted an attack and captured that position. At 09:30 Turkish troops were seen gathered on the north-east side of the hill. McCarroll asked for artillery support to break up their troops, but there was none available. The mountain battery, at the time, only had four rounds left. The Turkish forces attacked and managed to close on the regiment's defences before they were stopped by rifle and machine-gun fire.[108][109]
With no further progress being made anywhere, and the arrival of more Turkish reinforcements, a withdrawal back across the River Jordan was ordered that night. Plans were made for the wounded to leave first, then the fighting troops falling back in turn.[110][111] McCarroll gave each unit exact times they were to retire, so they still presented a continuous line as they moved back. They withdrew without attracting the attention of the Turkish troops and at 04:00 the regiment arrived back at Ain es Sir. The brigade was designated as the force rearguard. At 16:00 a large Turkish force was reported by the Canterbury Mounted Rifles to be approaching from the north, so the regiment was sent to help. The Turkish force had come to within 1,000 yards (910 m) of the New Zealand lines, but did not attack. The next day, 1 April, the withdrawal continued and several times Turkish troops were sighted following. They eventually reached Nimrin in the Jordan Valley at 20:00 that night. The regiment's exact casualties are not documented, but the NZMRB lost thirty-eight dead, 122 wounded and had thirteen men reported missing during the raid.[82][112][113]
Es Salt raid
[edit]
The regiment spent most of April on patrol and guard duties to the west of the River Jordan. The Rugby football team were presented, by Lieutenant-General Harry Chauvel, commanding the Desert Mounted Corps, with the division's cup for being the champion team.[114] The second raid across the Jordan on Es Salt began on 29 April, with the brigade initially being held in reserve. The operation had similar problems as the first raid, and on 30 April the brigade was moved forward. The Wellington Mounted Rifles and Canterbury Mounted Rifles were ordered to support the assault by the infantry at Nimrin, while the regiment remained in reserve. At 09:30 the 4th Squadron was sent forward to support the Canterbury Mounted Rifles, but a Turkish artillery barrage, by at least four batteries, landed to their front, preventing them going forward. The artillery fire increased and the rest of the regiment had to retire to put the horses out of harm's way. Without making further progress that day, the regiment returned to the Ghoraniyeh bridgehead for the night. More Turkish reinforcements arrived overnight and opposition to any British advance was increasing. Eventually the regiment was ordered to gallop forward to the front line, deploying to cover two miles (3.2 km) along the track from Es Salt. One of the first things they observed was a party of RHA artillerymen going back without their guns, which they had been forced to abandon. The 3rd and 4th Squadrons began digging trenches, as the regiment had to hold a position covering the only way back for the 4th Light Horse Brigade, to their front. On 2 May the Australians were ordered to withdraw, reaching the regiment's position the next day. That night the regiment withdrew to a ford at Auja, where engineers were constructing a pontoon bridge. The regiment remained there alone the next day while the rest of the NZMRB returned to their previous camp near Jericho. The regiment was relieved the next day and rejoined the brigade.[82][115][116]
Summer 1918
[edit]The regiment remained in the western foothills of the Jordan Valley, based at Talat Ed Dumm, until the end of May, then moved to El Khudr, beside Bethlehem, where some men were granted leave in Port Said, and Jerusalem. In June the regiment returned to the valley, based at the Wadi Abeid, carrying out patrols and enhancing defences. At the start of July, they moved again, this time to Ain Ed Duk, relieving the Wellington Mounted Rifles. On 18 July the 1st Light Horse Brigade, to the regiment's left, was attacked by a large force of Germans. Turkish troops supporting that attack also attempted to break the regiment's line, but they were fought off. Relieved a few days later, the regiment returned to Bethlehem. Casualties during the month were all down to malaria, or other diseases, 170 men being evacuated to hospital. In August they returned to duties in the valley at Jericho, and another 109 men were evacuated to hospital during the month.[117][118]
Chaytor's Force
[edit]In September, Chaytor, commanding the ANZAC Mounted Division, was given command of a mixed mounted and infantry force to carry out a deception plan in the Jordan Valley.[119] The regiment helped by constructing dummy camps with dummy horse lines and increased their patrolling, with the objective of discovering the Turkish strength and positions. The rest of the army was aligned to their left flank and on 19 September started the last attack major attack of the campaign. With the Turkish forces retiring to counter the attack in the west, by 21 September the NZMRB was ordered forward, reinforced by two battalions of the British West Indies Regiment, their own Ayrshire Battery RHA and the 29th Indian Mountain Battery.[82][120][121]
Damieh
[edit]That night, 21 September, the regiment left its base at Musallabeh and headed north up the Jordan Valley. The 4th Squadron, leading, covered the first ten miles (16 km), reaching Kh Fusail and then Tel Es Ed Dhiab, with no opposition. They encountered a Turkish defence line at the Mafid Jozeleh bridge, which was captured along with twenty prisoners and two machine-guns. That night the infantry were left guarding the bridge, while the NZMRB continued advancing north to secure an important bridge at Damieh, cutting the Nablus road.[122][123]
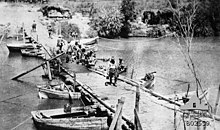
At midnight the regiment, supported by a section of the brigade machine-gun squadron, set out again, leading the brigade along the Jericho-Beisan road. The 3rd Squadron was sent ahead, after a force of Turkish troops believed to be withdrawing along the road in front of them, and to capture the Damieh bridge. The 11th Squadron remained on the road as a blocking force while the 4th Squadron headed to El Makhruk to the north-east. The 11th Squadron captured a Turkish convoy that came along the road, while the 3rd Squadron caught up with the force in front of them, capturing several prisoners. They also discovered a Turkish cavalry picket line and forced them down from the hills onto the low ground along the river towards the Damieh bridge. The 3rd Squadron, holding the high ground, was counter-attacked by infantry supported by artillery. Part of the squadron was forced to retire to a better defensive position. As reinforcements were observed arriving for the Turkish force, a regiment attack was ordered and reinforcements of their own requested. Support came from a squadron of the Canterbury Mounted Rifles and a West Indies infantry company. The regiment was around five hundred yards (460 m) from the bridge, almost surrounding the Turkish position there. McCarroll planned the assault, with six troops and a machine-gun on the left to provide fire support. Then from left to right, less one troop in reserve, the rest of the regiment positioned itself from left to right, followed by the West Indies company, then the Canterbury Mounted Rifles squadron on the right. The attack began, supported by machine-gun and artillery fire. The Turkish line was pierced and they started to withdraw across the bridge pursued by the regiment. The bridge was secured intact, along with 350 prisoners and seven machine-guns. The regiment had four dead and one wounded. One of the West Indies soldiers was also wounded. The regiment now settled in, defending the bridge while the Canterbury Mounted Rifles squadron crossed and started clearing the far bank.[82][124][125]
Es Salt again
[edit]The next day the brigade crossed the bridge and at midday continued east towards Es Salt. By 17:00 the regiment was camped to the west of the town. They entered the unoccupied Es Salt on the following day, watered their horses, then continued east towards Amman as the vanguard. Passing abandoned wagons, dead men and animals, they had caught up with the Turkish rearguard by 12:00, but had to stop at the village of Suweileh to water their horses and wait for the rest of the brigade to catch up with them. That night a selected group of 100 men, commanded by Major John Herrold, were sent out twelve miles (19 km) across country to damage the Hedjaz rail line south of Amman. Each of the three squadrons provided an officer and thirty-three men. Their only tools were two picks, two shovels, and four spanners. The force was divided into three: one to tackle the rails and the other two to provide protection. When they found the rail line, they followed it for about two miles (3.2 km). Hearing sounds of digging, they dismounted, continuing on foot until they located a group of Turks digging trenches. Part of their objective was to remain undetected, so they withdrew, leaving the Turkish force alone. They eventually located the section of track they were looking for. However, the road alongside the tracks was full of Turkish traffic. Establishing a base four hundred yards (370 m) from the track, the rail group now crept forward to attack the tracks. Their work was first interrupted when an armoured train with trucks full of soldiers came along the rails. They were next disturbed by a mounted patrol, which passed by without observing them. They eventually removed two rails, making the tracks unusable. The group then returned to their horses and returned to the regiment at dawn. That day the value of their efforts was seen when a train was wrecked where they had broken the rails.[82][126][127] For his command of the operation Herrold was invested as a Companion of the Distinguished Service Order.[128]
Amman again
[edit]On 25 September, the same day the railway group returned, the brigade set out at 06:00 for Amman. Approaching from the north, they would be supported during the assault by the 2nd Light Horse Brigade. At 10:30 the regiment, with a machine-gun section and an artillery section, was ordered to move forward to the left of the Canterbury Mounted Rifles. The Turkish defenders were in redoubts surrounded by barbed wire. McCarroll sent a squadron to attack from the west, which came under Turkish machine-gun fire. Covered by the artillery the squadron was gradually able to advance. At 15:30 the reserve squadron galloped forward, dismounted and came under machine-gun fire. The regiment and Canterbury Mounted Rifles pushed forward. The 4th Squadron succeeded in reaching a double redoubt, but just as they were about to charge, sixty of the defenders surrendered and others withdrew along the Wadi Amman. By now the Canterbury Mounted Rifles had galloped into the town and out the other side, capturing the Turkish defences there from the rear. The battle was over and the brigade captured 1,734 prisoners, twenty-seven machine-guns, five artillery pieces, 298 horses and other military supplies. That night the regiment camped in the Wadi Amman.[82][129]
Several days later the NZMRB was moved to the south to support the 2nd Light Horse Brigade at Ziza. The light-horsemen had taken the surrender of a large Turkish force, part of the Turkish Fourth Army, then had to defend them from the Arab tribesmen. When the brigade arrived the Australian and Turkish troops, who were still armed, were holding a perimeter facing the Arab force. The brigade's appearance resolved the situation and the Turkish troops surrendered.[130][131]
Post war
[edit]
In October 1918, the regiment's part in the war now over; they returned to the Jordan Valley. However many men were now struck down with malaria. In the next few days those who were able returned to Richon-le-Zion, where they established their camp. By November the regiment had eleven officers and 331 other ranks in hospital; twenty-two of those died of the disease. Only two men from the regiment had not been infected in any way.[82][132]
The regiment remained at Richon until 18 December, carrying out military training and playing sports. Then they moved back to Rafa, where a school was established. It was discovered that before the war one of the regiment's troopers had been a schools inspector, so he was immediately promoted to major, taking charge of lessons.[133]
While waiting for repatriation to New Zealand the regiment played a minor role in the 1919 Egyptian Revolution, which was a Nationalist uprising in the Nile Delta region. The regiment were reissued its equipment and sent to support the authorities, as martial law had been declared. The uprising soon ended without any major incidents. One incident the regiment had to deal with was a request from an Egyptian woman for an officer to grant her a divorce. On 22 June the regiment moved to the Demobilisation Camp at Ismailia on the Suez Canal. They boarded the transport HMT Ulimaroa and sail for New Zealand. On 30 June the regiment ceased to exist as such. Five weeks later, on 8 August, the Ulimaroa arrived at Auckland.[134][135]
Casualties
[edit]During its service, 334 men of the regiment died from all causes, either killed in action, died of wounds or disease, and two were lost at sea. Almost two thirds of those, 202 men, were killed during the seven months they fought in the Gallipoli Campaign, while 130 died during the two years of the Sinai and Palestine Campaign. There were also 555 men wounded; 53 of those were unfortunate enough to have been wounded twice. The Gallipoli Campaign accounted for over half of the total number of wounded at 316 men; 22 of them were wounded twice. Then in the Sinai and Palestine Campaign, there were another 239 men wounded, with 31 of those again wounded twice.[136]
Many of the Gallipoli dead have no known grave. The Commonwealth War Graves Commission Chunuk Bair Cemetery, constructed on the site where the Turks buried Allied war dead after the evacuation, has 632 graves. Only ten of the men there have been identified.[137] At the nearby Hill 60 Cemetery, which has another 788 graves, only seventy-six of the dead were identified.[138]
Honours
[edit]Several men of the regiment were recognised for their service by the British Empire awards system. The two commanding officers, Mackesy and McCarroll, were invested as Companions of the Order of St Michael and St George,[139][140] and as Companions of the Distinguished Service Order (DSO).[141] McCarroll also received a bar for the DSO to signify a second award.[142] While Mackesy was also invested as a Commander of the Order of the British Empire.[143] Two other men also received a DSO both majors, Herrold for the raid on the rail line at Amman and Ralph Wyman at Gallipoli.[144] There were two civilian awards, of an Officer of the Order of the British Empire and a Member of the Order of the British Empire. The Military Cross was awarded to eight officers; two men received bars for a second award. The other ranks were awarded six Distinguished Conduct Medals, and sixteen Military Medals. There were also twenty-six men Mentioned in Dispatches for all ranks.[139]
References
[edit]- Footnotes
- ^ At the time of the First World War, the modern Turkish state did not exist, and instead it was part of the Ottoman Empire. While the terms have distinct historical meanings, within many English-language sources the term "Turkey" and "Ottoman Empire" are used synonymously, although many academic sources differ in their approaches.[18] The sources used in this article predominately use the term "Turkey".
- ^ Arabic names have been changed to English for better understanding.
- Ain = Spring
- Bir = Well
- Ed, El, Er, Es, Ez = The definite article "The"
- Jebel = Mountain
- Jisr = Bridge
- Makhadet = Ford
- Nahr = River
- Tel = Mound[39]
- ^ The battery was part of the Imperial Camel Corps Brigade, and used small calibre mountain guns, which could be dismantled and carried by man or animal.[98][99]
- Citations
- ^ Kinloch 2005, p.32
- ^ Wilkie 1924, p.10
- ^ Nicol 1921, p.2
- ^ "Mackesy, Charles Ernest Randolph". Te Ara: The Encyclopedia of New Zealand. Retrieved 5 November 2013.
- ^ a b "Auckland Mounted Rifles Regiment". New Zealand History. Retrieved 5 November 2013.
- ^ Waite 1919, p.6
- ^ Powles 1922, p.3
- ^ Stack 2011, p.1883
- ^ Kinloch 2005, p.4
- ^ Nicol 1921, pp.8–9
- ^ Nicol 1921, pp.10–11
- ^ Nicol 1921, p.14
- ^ Nicol 1921, pp.16–20
- ^ Nicol 1921, p.21
- ^ Nicol 1921, pp.28–29
- ^ a b c d e f g h "1915 – Auckland Mounted Rifles Regiment timeline". New Zealand History. Retrieved 5 November 2013.
- ^ Nicol 1921, p.35
- ^ Fewster, Basarin, Basarin 2003, pp.xi–xii
- ^ Nicol 1921, p.54
- ^ Nicol 1921, p.61
- ^ Nicol 1921, pp.42–45
- ^ Wilkie 191, p.151
- ^ Nicol 1921, p.75
- ^ Nicol 1921, pp.81–84
- ^ Nicol 1921, pp.85–86
- ^ Nicol 1921, pp.87–91
- ^ Nicol 1921, pp.95–96
- ^ Nicol 1921, pp.97–98
- ^ a b c d "1916 – Auckland Mounted Rifles Regiment timeline". New Zealand History. Retrieved 6 November 2013.
- ^ Powles 1922, p.12
- ^ Powles 1922, p.7
- ^ Nicol 1921, p.99
- ^ Nicol 1921, p.102
- ^ Nicol 1921, pp.102–103
- ^ Powles 1922, p.5
- ^ a b Gullett 1923, p.120
- ^ Powles 1922, p.6
- ^ Nicol 1921, p.106
- ^ Powles 1922, Appendix I
- ^ Nicol 1921, pp.107–108
- ^ Powles 1922, p.31
- ^ Nicol 1921, pp.108–109
- ^ Nicol 1921, pp.111–112
- ^ Nicol 1921, pp.113–114
- ^ Nicol 1921, p.115
- ^ Nicol 1921, pp.116–118
- ^ Nicol 1921, p.125
- ^ Powles 1922 p.49
- ^ Nicol 1921, pp.124–127
- ^ Powles 1922, p.50
- ^ Nicol 1921.pp.129–130
- ^ Powles 1922, p.65
- ^ Powles 1922, p.70
- ^ Nicol 1921, pp.130–134
- ^ a b c d e f g "1917 – Auckland Mounted Rifles Regiment timeline". New Zealand History. Retrieved 9 November 2013.
- ^ Powles 1922, pp.71–77
- ^ Nicol, pp.138–139
- ^ Powles 1922, pp.84–95
- ^ Nicol 1921, p.140
- ^ Nicol 1921, pp.142–143
- ^ Nicol 1921, pp.143–145
- ^ Powles 1922, pp.99–105
- ^ Nicol 1921, p.145
- ^ Nicol 1921, pp.146–151
- ^ Nicol 1921, pp.155–156
- ^ Nicol 1921, pp.156–157
- ^ Powles 1922, p.138
- ^ Nicol 1921, pp.157–158
- ^ Powles 1922, p.139
- ^ Nicol 1921, pp.159–160
- ^ Powles 1922, pp.141–142
- ^ Nicol 1921, pp.161–162
- ^ Nicol 1921, pp.162–163
- ^ Nicol 1921, pp.163–165
- ^ Powles 1922, pp.145–151
- ^ Nicol 1921, p.166
- ^ Powles 1922, p.159
- ^ Nicol 1921, pp.168–171
- ^ Powles 1922, pp.161–165
- ^ Nicol 1921, p.172
- ^ Nicol 1921, pp.175–176
- ^ a b c d e f g h i "1918 – Auckland Mounted Rifles Regiment timeline". New Zealand History. Retrieved 10 November 2013.
- ^ Nicol 1921, p.177
- ^ Nicol 1921, p.179
- ^ Nicol 1921, pp.181–182
- ^ Powles 1922, pp.171–179
- ^ Nicol 1921, pp.182–183
- ^ Nicol 1921, pp.183–184
- ^ Powles 1922, pp.181–183
- ^ Nicol 1921, pp.184–185
- ^ Powles 1922, p.183
- ^ Powles 1922, p.190
- ^ Nicol 1921, p.189
- ^ Nicol 1921, pp.190–191
- ^ Powles 1922, pp.193–194
- ^ a b Nicol 1921, pp.191–194
- ^ Powles 1922, pp.193–197
- ^ Nicol 1921, p.195
- ^ "Camel artillery ready to fire". Ministry for Culture and Heritage. 15 July 2013. Retrieved 11 November 2013.
- ^ Nicol 1921, pp.195–196
- ^ Nicol 1921, pp.196–197
- ^ Powles 1922, pp.197–198
- ^ Nicol 1921, pp.197–199
- ^ Powles 1922, pp.200–201
- ^ Nicol 1921, p.200
- ^ Powles 1922, pp.202–203
- ^ Powles 1922, p.206
- ^ Nicol 1921, pp.202–205
- ^ Powles 1922, pp.206–209
- ^ Nichol 1921, p.206
- ^ Powles 1922, p.212
- ^ Nichol 1921, pp.206–210
- ^ Powles 1922, pp.211–212
- ^ Nicol 1921, pp.212–213
- ^ Nicol 1921, pp.214–216
- ^ Powles 1922, pp.221–223
- ^ Nicol 1921, pp.218–221
- ^ Powles 1922, pp.231–232
- ^ General Edmund Allenby (4 February 1922). "Supplement to the London Gazette, 4 February, 1920" (PDF). London Gazette. Retrieved 11 November 2013.
- ^ Nicol 1921, pp.22–224
- ^ Powles 1922, p.237
- ^ Nicol 1921, pp.222–224
- ^ Powles 1922, pp.246–247
- ^ Nicol 1921, pp.224–226
- ^ "No. 31087". The London Gazette (Supplement). 30 December 1918. p. 15188.
- ^ Nicol 1921, pp,227–230
- ^ Powles 1922,pp.248–252
- ^ "No. 31219". The London Gazette (Supplement). 7 March 1919. p. 3227.
- ^ Nicol 1921, pp.231–233
- ^ Nicol 1921, pp.233–234
- ^ Powles 1922, pp.254–256
- ^ Nicol 1921, pp.235–236
- ^ Nicol 1921, pp.236–238
- ^ "1919 – Auckland Mounted Rifles Regiment timeline". New Zealand History. Retrieved 10 November 2013.
- ^ Nicol 1921, pp.239–240
- ^ Nicol 1921, pp.245–263
- ^ "Chunuk Bair (New Zealand) Memorial". Commonwealth War Graves Commission. Retrieved 26 November 2013.
- ^ "Hill 60 Cemetery". Commonwealth War Graves Commission. Retrieved 26 November 2013.
- ^ a b Nicol 1921, pp.264–265
- ^ "No. 31684". The London Gazette (Supplement). 9 December 1919. p. 15440.
- ^ "No. 29886". The London Gazette (Supplement). 29 December 1916. p. 29.
- ^ "No. 30555". The London Gazette (Supplement). 1 March 1918. p. 2727.
- ^ "No. 31371". The London Gazette (Supplement). 30 May 1919. p. 6926.
- ^ "Ralph Wyman". Auckland War Memorial Museum. Retrieved 9 July 2022 – via Online Cenotaph.
- Bibliography
- Fewster, Kevin; Basarin, Vecihi; Basarin, Hatice Hurmuz (2003). Gallipoli: The Turkish Story. Crows Nest, New South Wales: Allen and Unwin. ISBN 1-74114-045-5.
- Gullett, Henry Somer (1923). The Australian Imperial Force in Sinai and Palestine, 1914–1918. Official History of Australia in the War of 1914–1918. Vol. VII. Sydney: Angus and Robertson. OCLC 59863829.
- Kinoch, Terry (2005). Echoes of Gallipoli: In the Words of New Zealand's Mounted Riflemen. Wollombi: Exisle Publishing. ISBN 0-908988-60-5.
- Nicol, C.G. (1921). The Story of Two Campaigns: Official War History of the Auckland Mounted Rifles Regiment, 1914–1919. Auckland: Wilson and Horton. ISBN 1-84734-341-4.
- Powles, C. Guy; Wilkie, A. (1922). The New Zealanders in Sinai and Palestine. Official History New Zealand's Effort in the Great War. Vol. III. Auckland: Whitcombe & Tombs. OCLC 2959465.
- Stack, Wayne (2011). The New Zealand Expeditionary Force in World War I. Men-at-arms series. Vol. 473. Oxford: Osprey Publishing. ISBN 978-1-84908-888-6.
- Waite, Fred (1919). The New Zealanders at Gallipoli. Christchurch: Whitcombe and Tombs. ISBN 1-4077-9591-0.
- Wilkie, A. H. (1924). Official War History of the Wellington Mounted Rifles Regiment, 1914–1919. Auckland: Whitcombe and Tombs. ISBN 978-1-84342-796-4.

